 04 Oct 2016
In this article I am going to show how to auto post your articles from Jekyll blog that is hosted on github pages or any other hosting site, to your Facebook, Twitter and LinkedIn account. Since jekyll is a static site and it does not have any plugin that automatically posts your article to the social networks we need to follow this process in order to succeed.
I am going to show you the steps of setting up the Twitter but it is similar if you want to setup Facebook or LinkedIn. So lets move on to the steps:
1. First you need to enable “Jekyll Feed Plugin” in your site. In order to do that, add this line to your site’s _config.yml:
plugins:
  - jekyll-feed
Please note that _config.yml does not support “TAB” so use “white space” for indentation.
2. Now place following line inside the <head> section of your template which is probably inside “_include/head.html”.
{% feed_meta %}This plugin will automatically generate an Atom feed at “/feed.xml” or “_site/feed.xml”, if you are running locally.
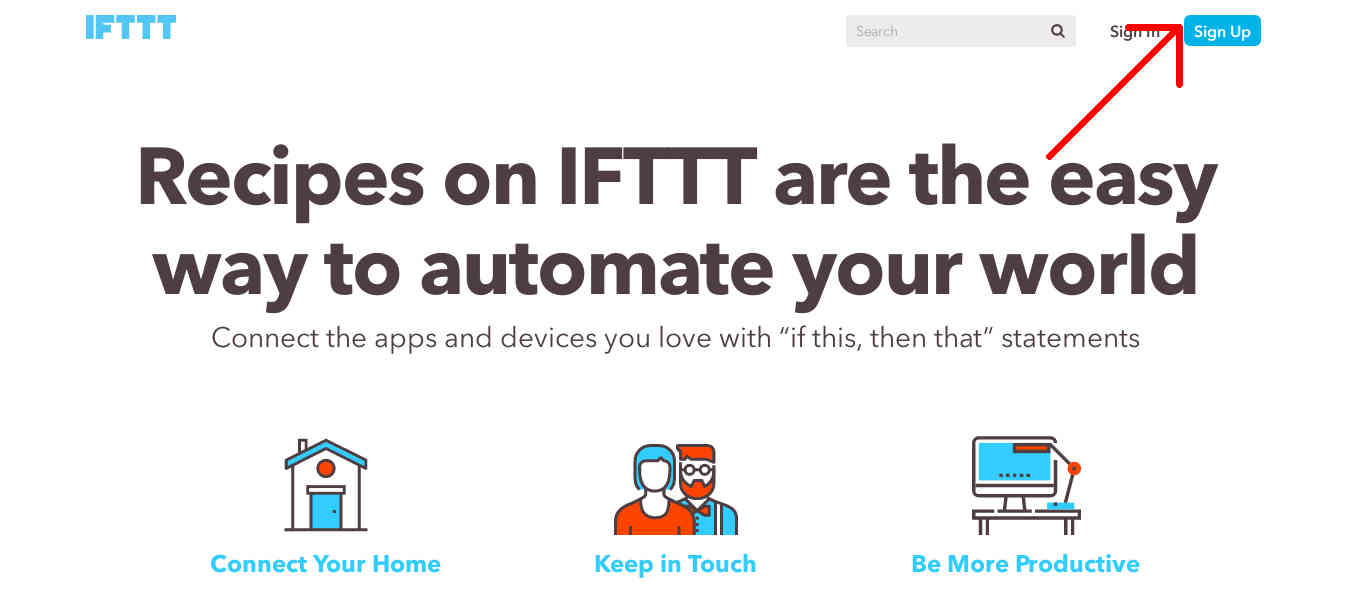
3. Go to IFTTT and sign-up for an account.
4. After creating an account, you will see the page similar to the image below except your recipes will be empty.
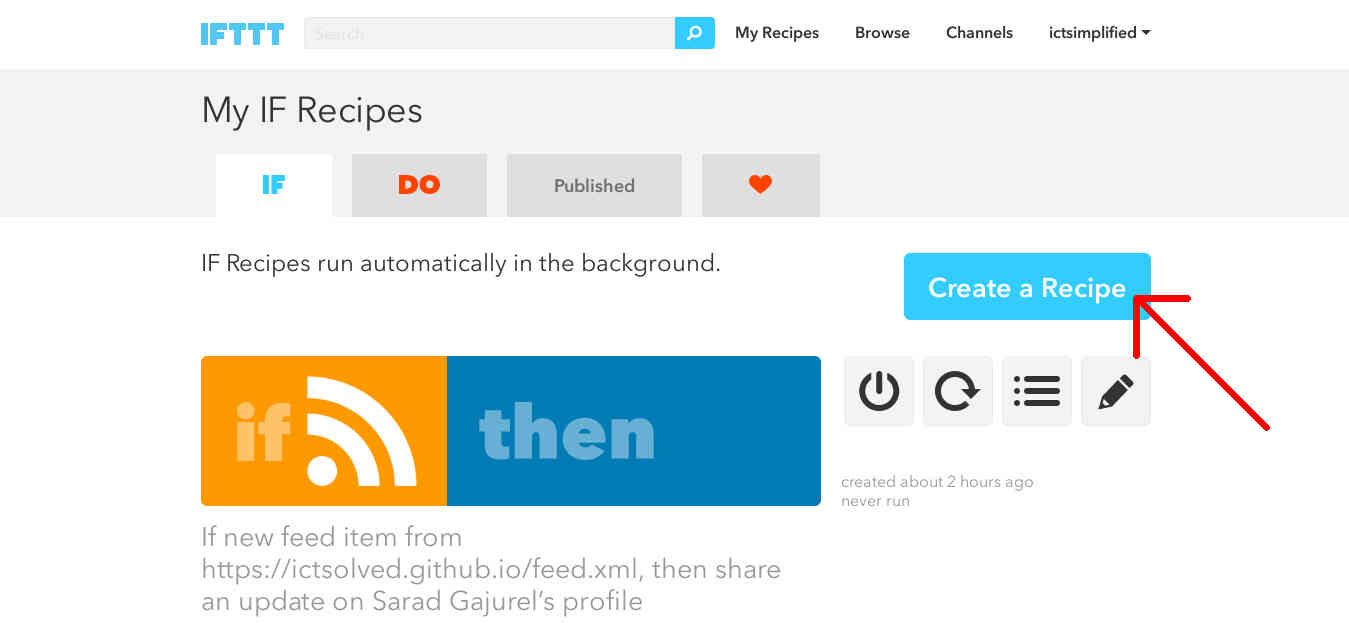
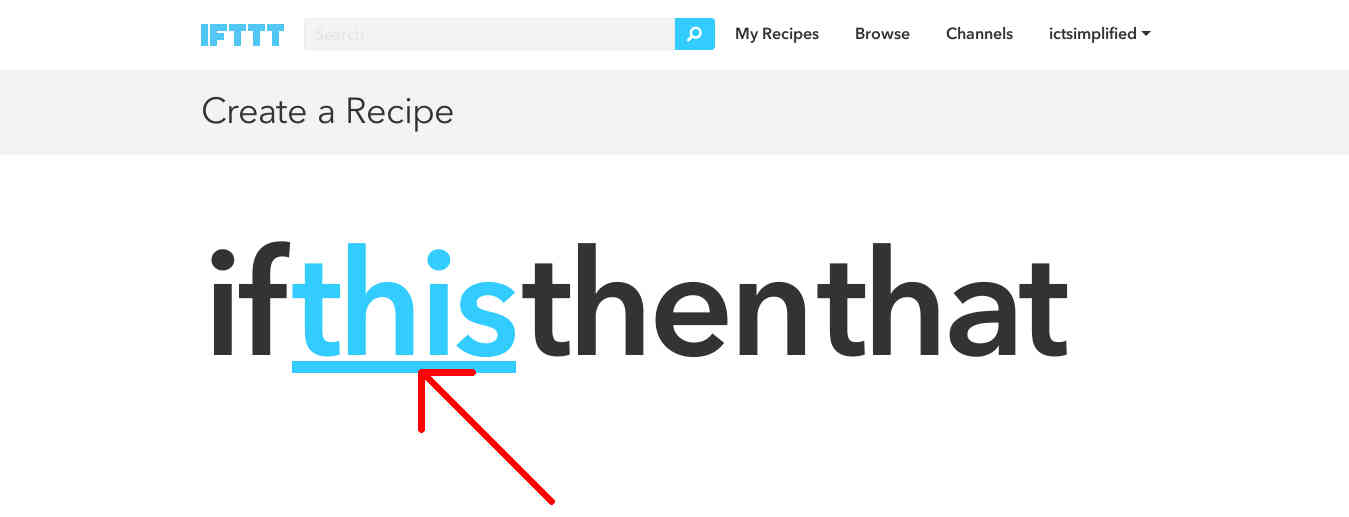
Click on Create a Recipe and the following page appears. We have to set a trigger so click on the link “this” which is underlined and highlighted with a cyan colour.
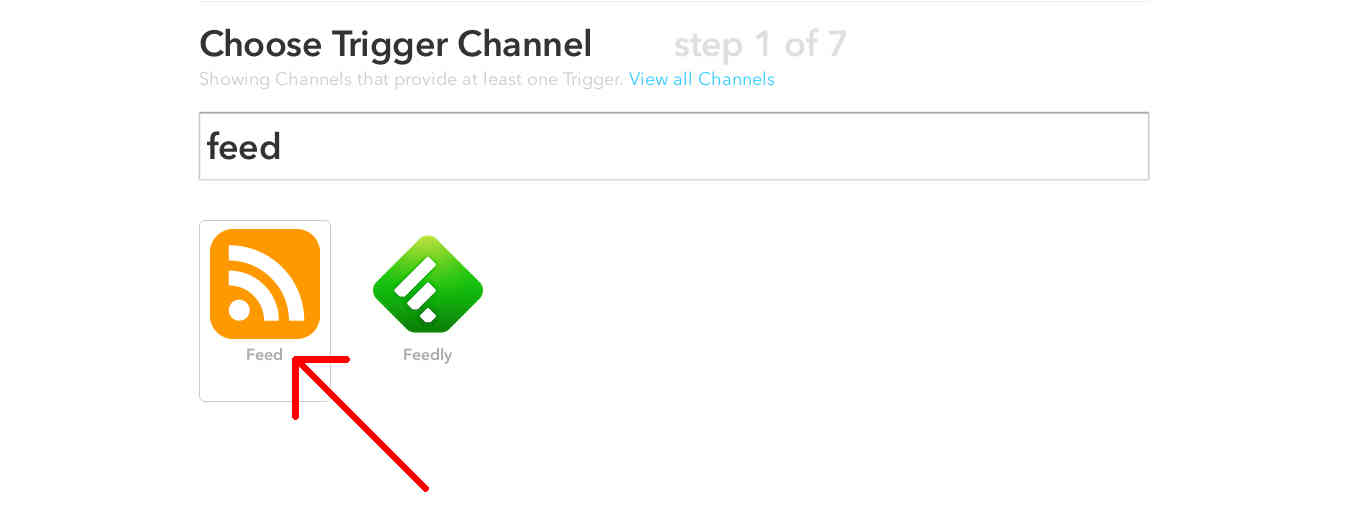
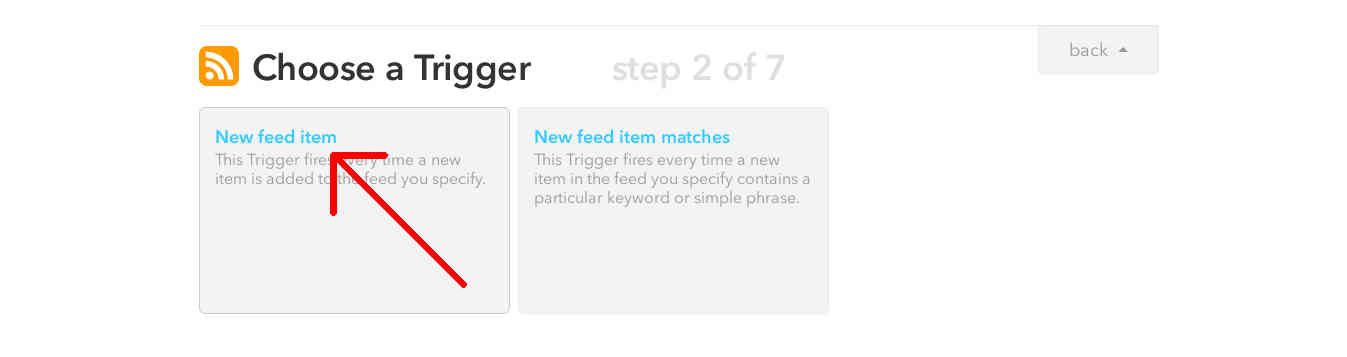
5. To choose the trigger channel, type “feed” in search bar and the result with orange RSS feed icon shows up. Click that icon.
6. In the resulting page, choose “New feed item” as the trigger.
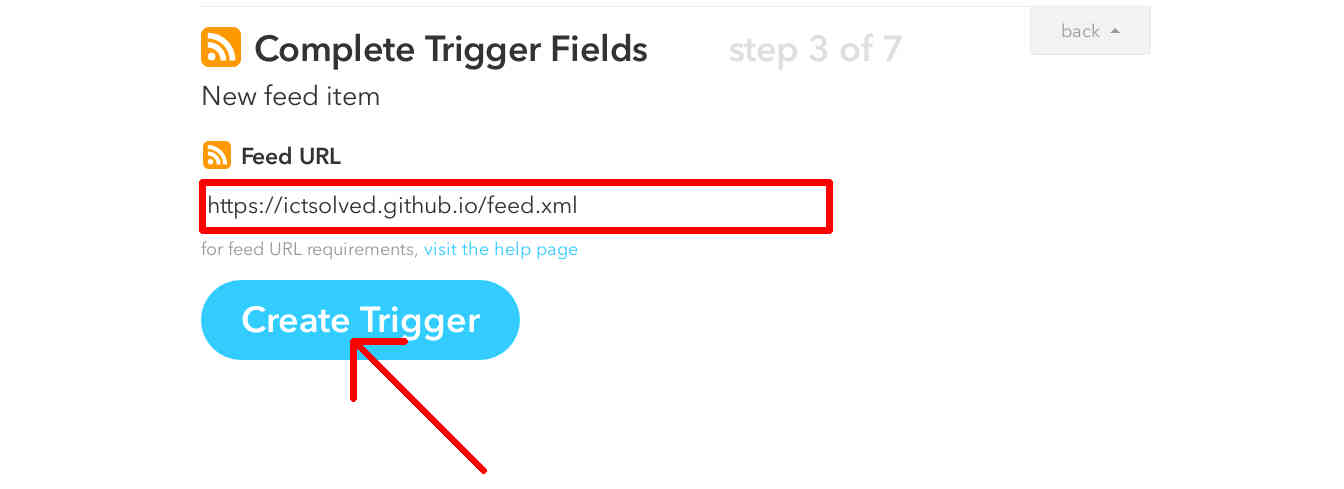
7. The next step is to provide link of feed.xml. If your site is hosted in Github it is probably “github_username.github.io/feed.xml” or “github_username.github.io/repo_name/feed.xml”. Provide the link correctly link and click “Create Trigger”.
8. Trigger is set now. Another step is to execute action with the specified trigger so click “that” which is in cyan colour and underlined.

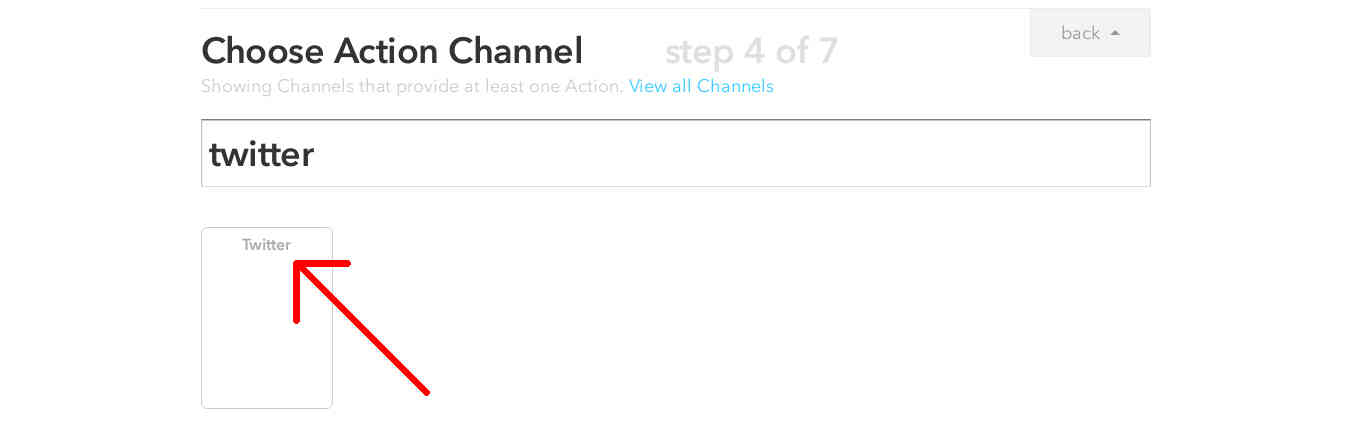
9. In the action channel search bar type in “twitter” and click on the result that comes in.
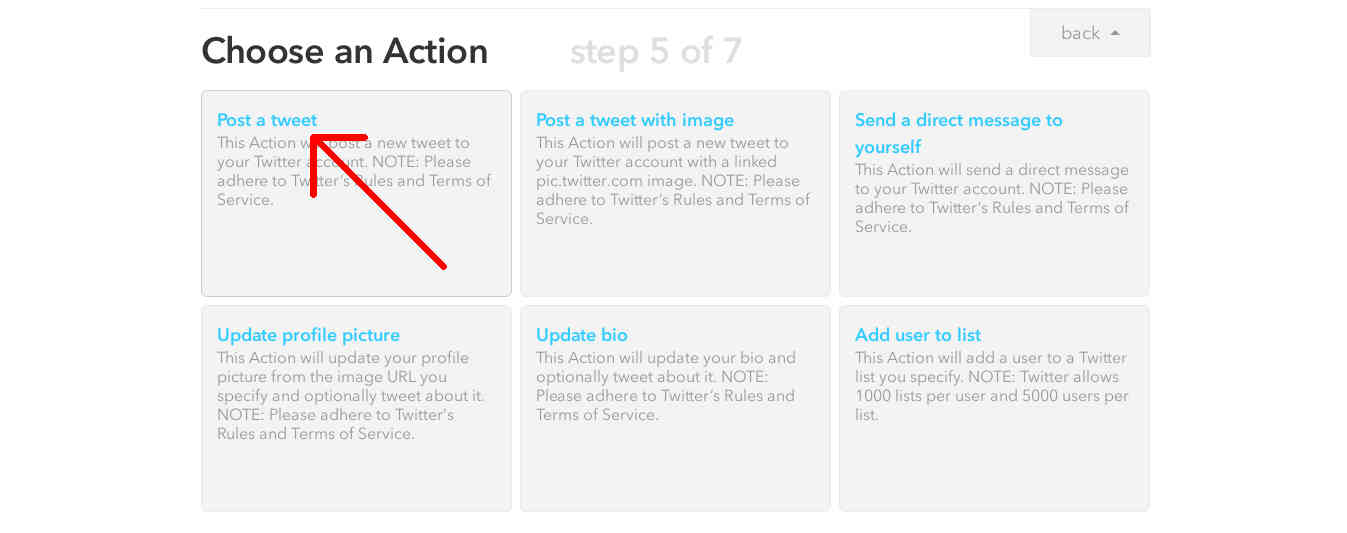
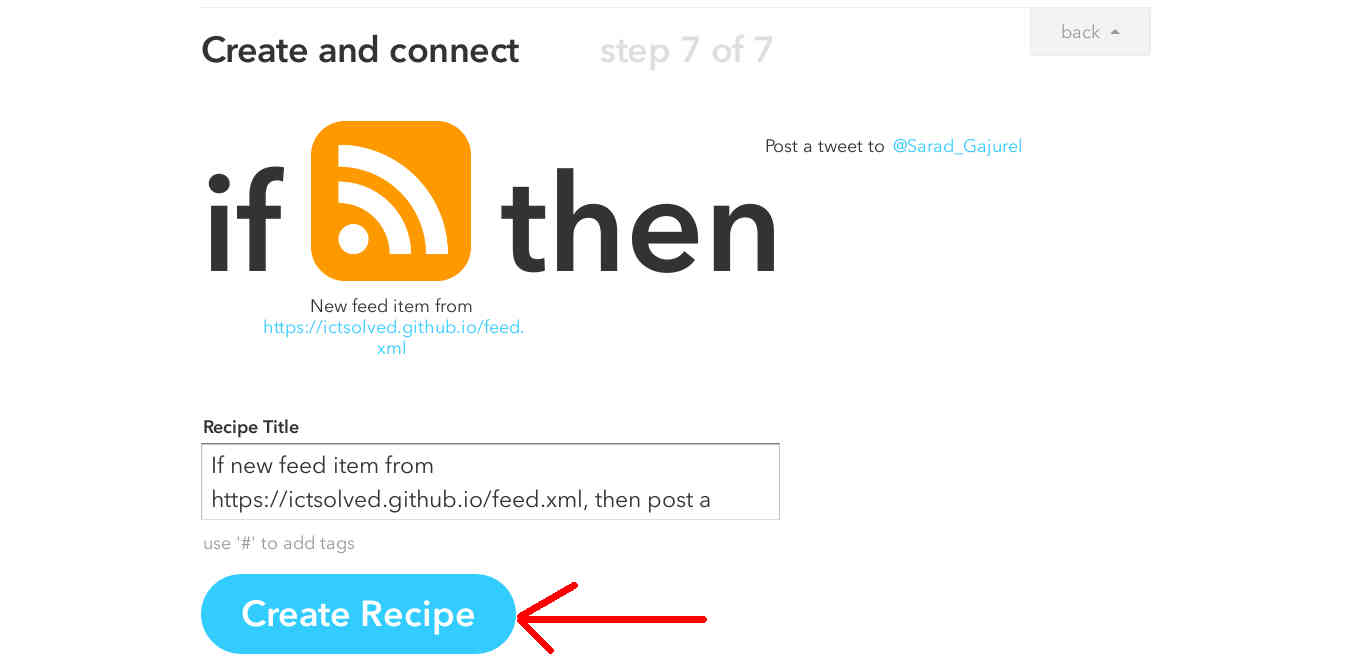
10. Connect twitter with IFTTT app. Since you want to auto tweet your new article choose “Post a tweet” action
11. The box contains “EntryTitle” and “EntryUrl” by default but to make it look more cool, you can add your desired phrase and click next. Finally click “Create Recipe”.
Congratulations! You have successfully setup auto posting your article to twitter. Afterwards whenever you post a new article, it is fetched from the feed and is tweeted on your profile within few minutes.
Note: The URL of your posts get shortened while tweeting but if you do not want shortened URL you can change the preference by following steps:
1. Click on your account name on the top right and choose Preferences
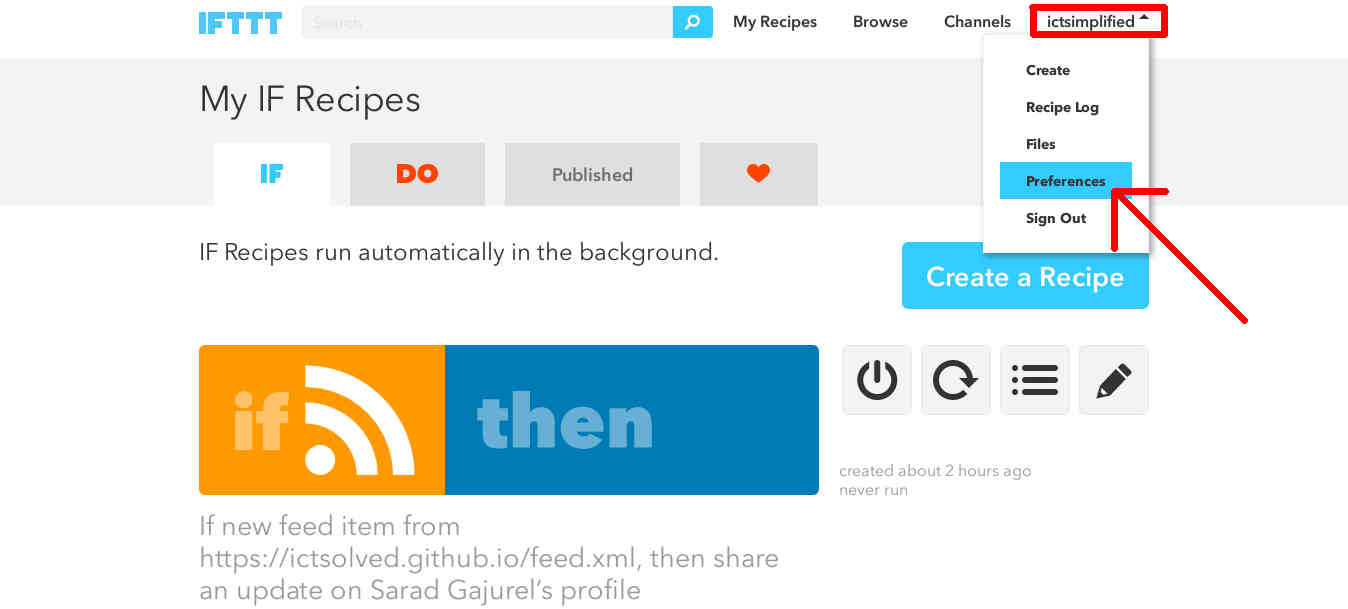
2. Remove check mark from “Auto shorten URLs” and click on Update settings

This is all you need to do. Don’t forget to share your experience on setting up IFTTT through comments.


